Curved kitchen islands can improve movement, soften the overall layout, and create a more natural flow in open spaces. But they also come with trade-offs in cost, fabrication, and storage efficiency. The difference between a well-designed curved island and one that causes problems usually comes down to planning.
This guide focuses on how curved islands actually work in real kitchens. It covers layout, usability, and practical constraints so you can decide if the shape makes sense for your space and how to execute it properly.
If you are looking for visual examples first, you can explore our 12 curved island ideas or a broader set of curved kitchen ideas before diving into the planning side.
What Is a Curved Kitchen Island?

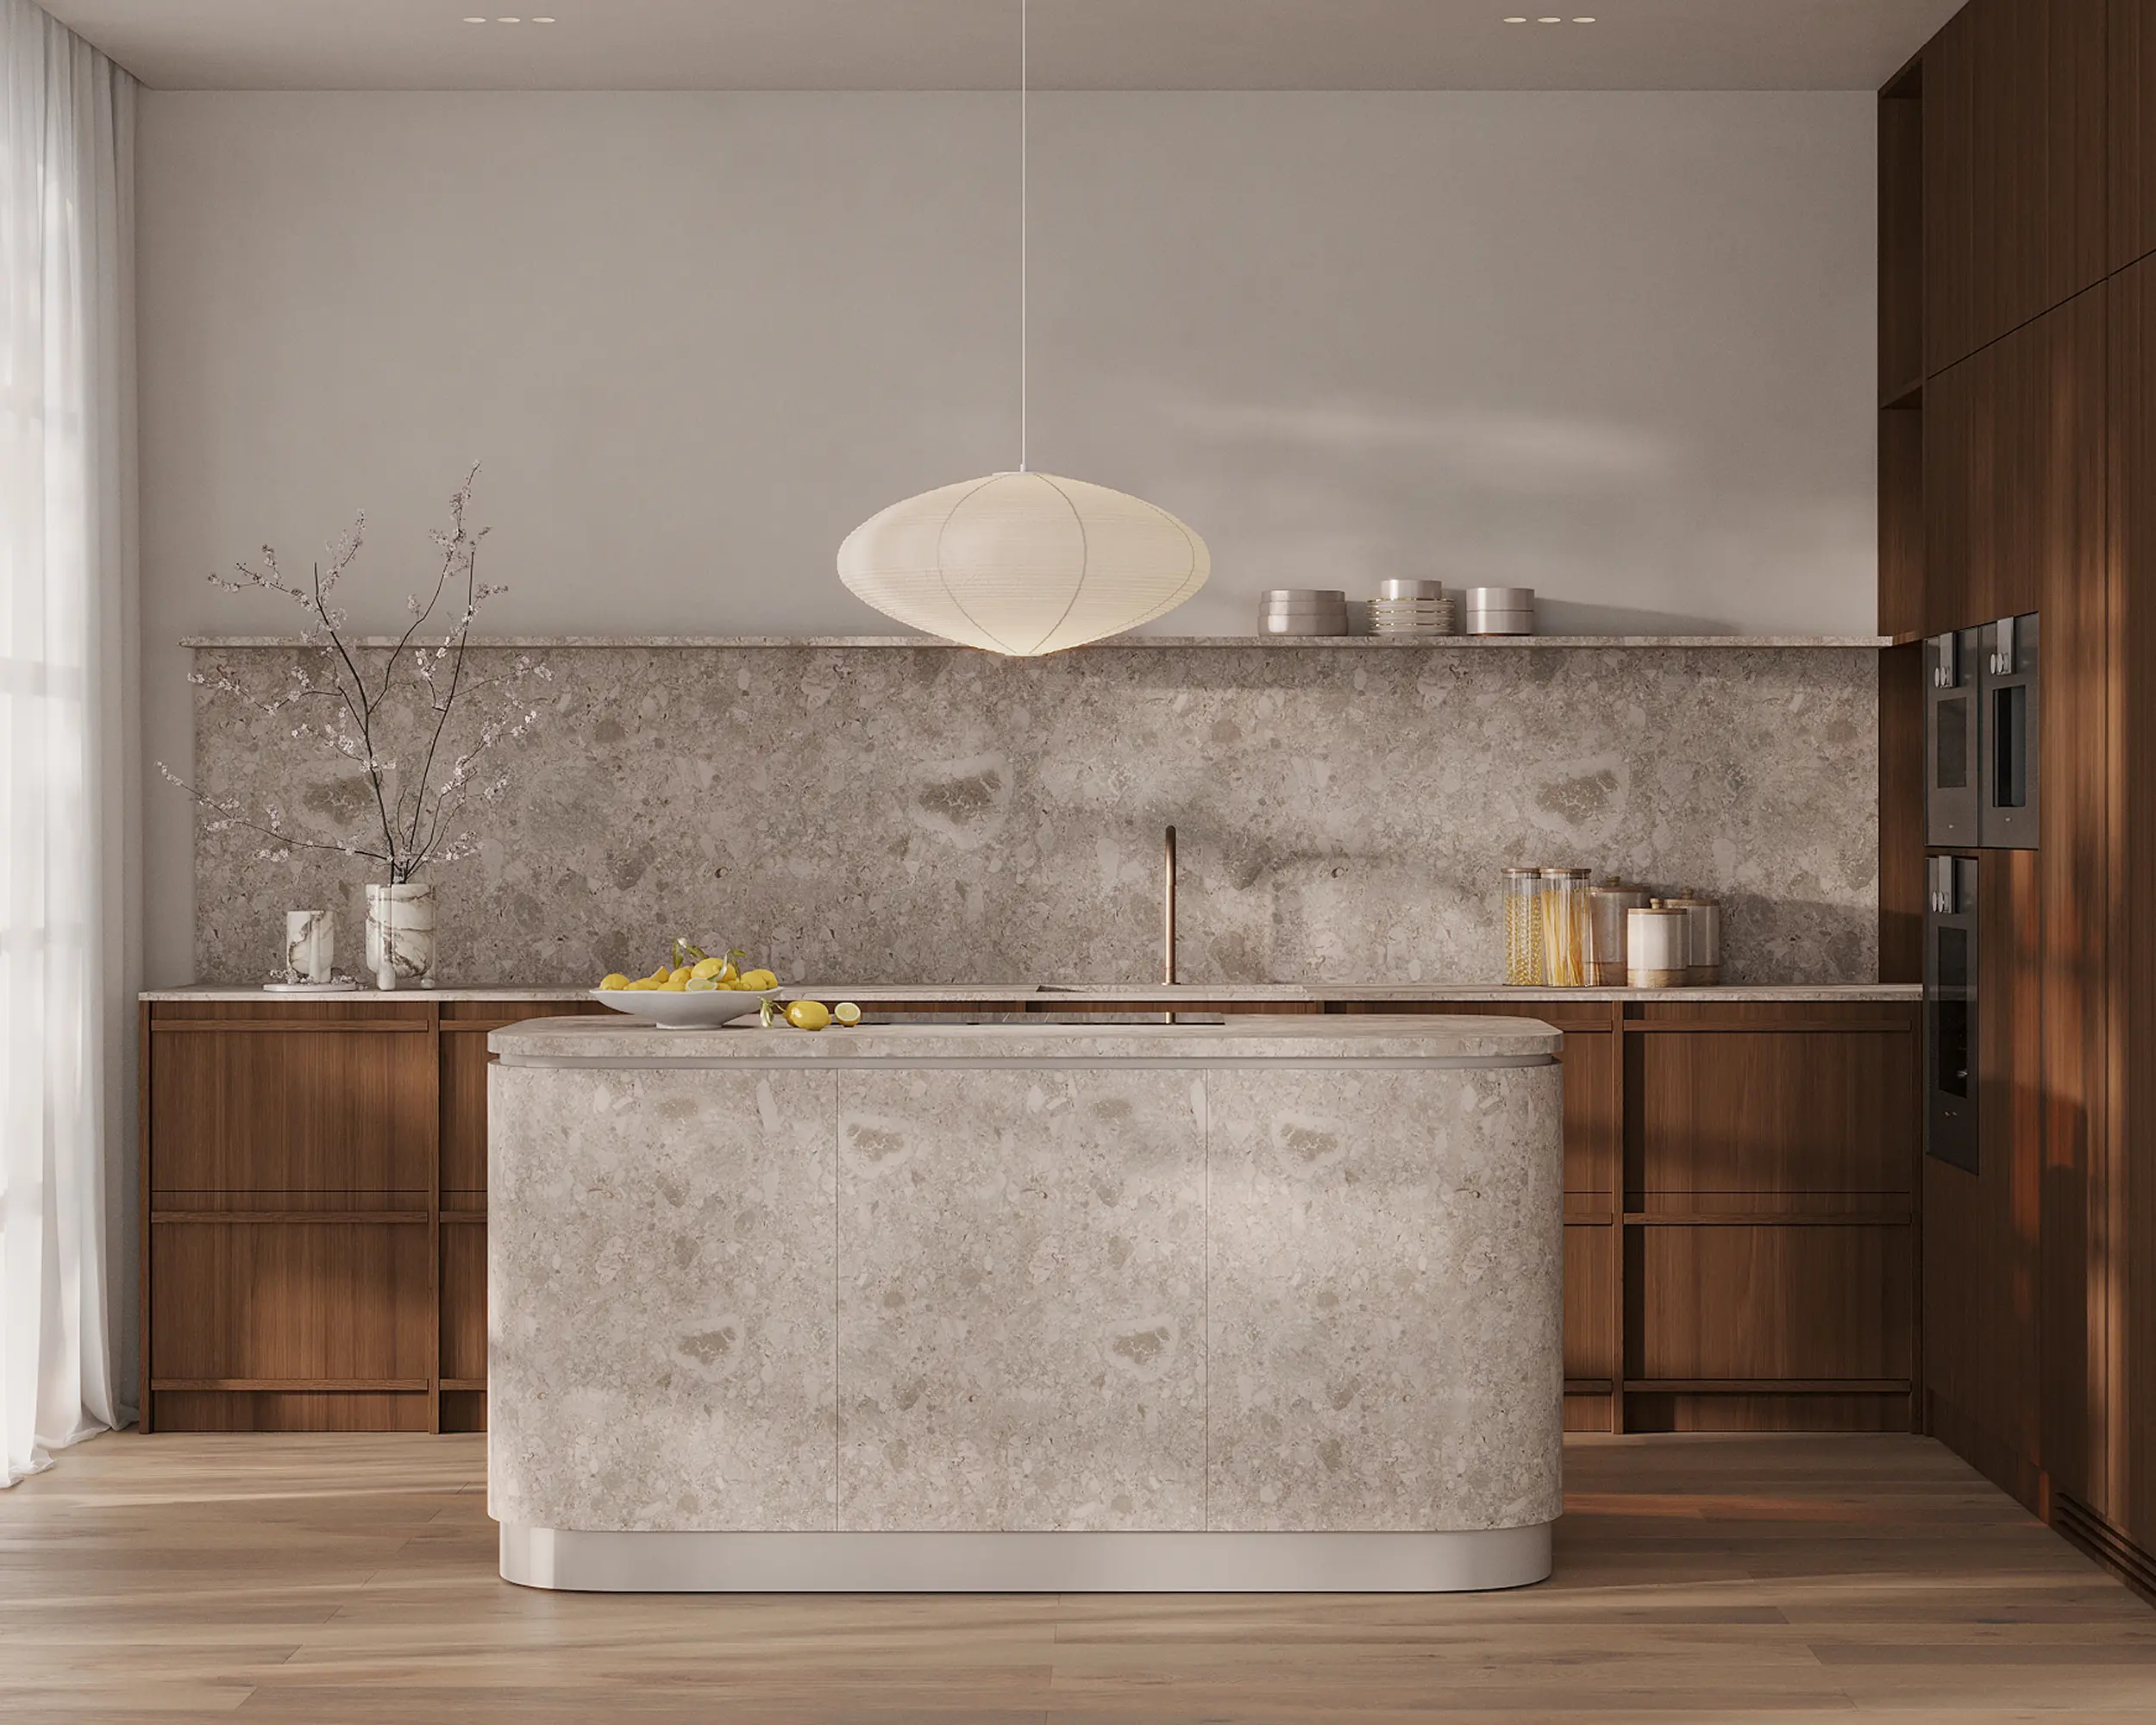
A curved kitchen island replaces sharp corners with rounded geometry. In some kitchens, that means a full radius or semicircular form. In others, it means a straighter island with one curved seating side or softened ends.
Not every curved island needs to be fully round to work well. Often, a gentle curve on one side is enough to improve flow, seating, or the transition between the kitchen and the surrounding space.
The best curved islands are not shaped for appearance alone. They are shaped to solve something, whether that is a tight traffic route, a harsh visual transition, or a seating area that feels better with a softer edge.
Curved Kitchen Island Clearances and Sizing Guide
Why Choose a Curved Kitchen Island?
.webp)
A curved kitchen island works best when it solves a specific layout or circulation problem.
One benefit is smoother movement. In open layouts, rounded edges can make circulation feel more natural because there are fewer abrupt corners along common walking paths. Another benefit is comfort in high-traffic areas. If people regularly pass the end of the island, a rounded edge feels more forgiving than a sharp rectangular corner.
Curved islands can also improve seating. A curved seating edge allows people to turn slightly toward one another, which makes the island feel more social compared to a straight counter.
Visually, a curved island can reduce the perceived weight of a large central block, especially in open kitchens where the island is visible from multiple angles.
That said, the shape only works when it supports function. If the curve reduces prep space, storage, or clearances, it becomes a disadvantage rather than an improvement. If you’re still deciding whether the overall approach makes sense, see our guide on are curved kitchens worth it.
Curved Kitchen Island Layouts
The success of a curved island depends heavily on the layout it sits in. In most kitchens, the curve should face the side where it improves movement, seating, or the transition into the room, while the working side stays more practical.
One-Wall Kitchen with Island

In a one-wall kitchen, the island often carries a large share of the function. That makes it important to protect the working side of the island.
The curve usually works best on the outer face, where it can soften the transition into the room and support seating. The side facing the cabinetry should stay efficient for prep and storage.
The main mistake here is making the island too sculptural for the space. A curve does not fix a layout that is already too tight.
L-Shaped Kitchen with Island

An L-shaped layout usually provides enough space for a curved island to feel intentional.
The curve works best on the outward-facing or seating side, while the inner edge remains more functional. This keeps prep areas clean and storage usable.
A common mistake is curving the working side, which reduces usable surface and drawer depth.
U-Shaped Kitchen with Island

This layout can work well, but only if aisle widths are properly maintained.
In most cases, the curve belongs on the outer side of the island. The sides facing cabinetry should stay straighter for efficiency.
The biggest mistake is forcing an island into a tight U-shape. A curve will not solve a lack of space.
Galley Kitchen

A curved island can work in a galley kitchen only if the room is wide enough.
In tighter layouts, a softened corner or rounded end is usually more practical than a fully curved island. This adds some relief without sacrificing function.
The most common mistake is assuming a curve will improve a narrow layout when the real issue is limited space.
Open-Plan Kitchens

Open-plan kitchens are often the best setting for curved islands.
Here, the curve can help the island feel more integrated with the living space and less like a block placed in the middle of the room. A curved seating side works especially well in this context.
The mistake to avoid is making the curve purely decorative. The island still needs to define prep zones, seating, and circulation clearly.
Materials for a Curved Kitchen Island
Material planning matters more with curved islands because seams, transitions, and surface continuity are more visible.
For countertops, quartz, marble, granite, and materials like Dekton can all work. The right choice depends not only on appearance but also on how easily the shape can be fabricated. Gentle curves are usually easier to execute cleanly than more complex forms.
For the island base, wood veneer is often a strong option because it wraps smoothly and adds warmth. Painted finishes can also work well, especially when the goal is a softer, sculptural look.
What matters most is not just the material itself, but how well it can be executed. Poor seam placement or awkward transitions tend to stand out more on curved surfaces than on straight ones.
Pros and Cons of a Curved Kitchen Island
Conclusion
A curved kitchen island can improve movement, soften the layout, and create a more comfortable seating experience. It works best when the shape is tied to circulation, zoning, and real use, not just appearance.
In most kitchens, the strongest solution is a balanced one. Keep the working side practical, place the curve where it improves movement or seating, and resolve materials early so the final result feels clean and intentional.
When those fundamentals are handled well, a curved island can improve both function and visual balance. When they are not, the shape tends to create more problems than it solves.
.webp)