.webp)
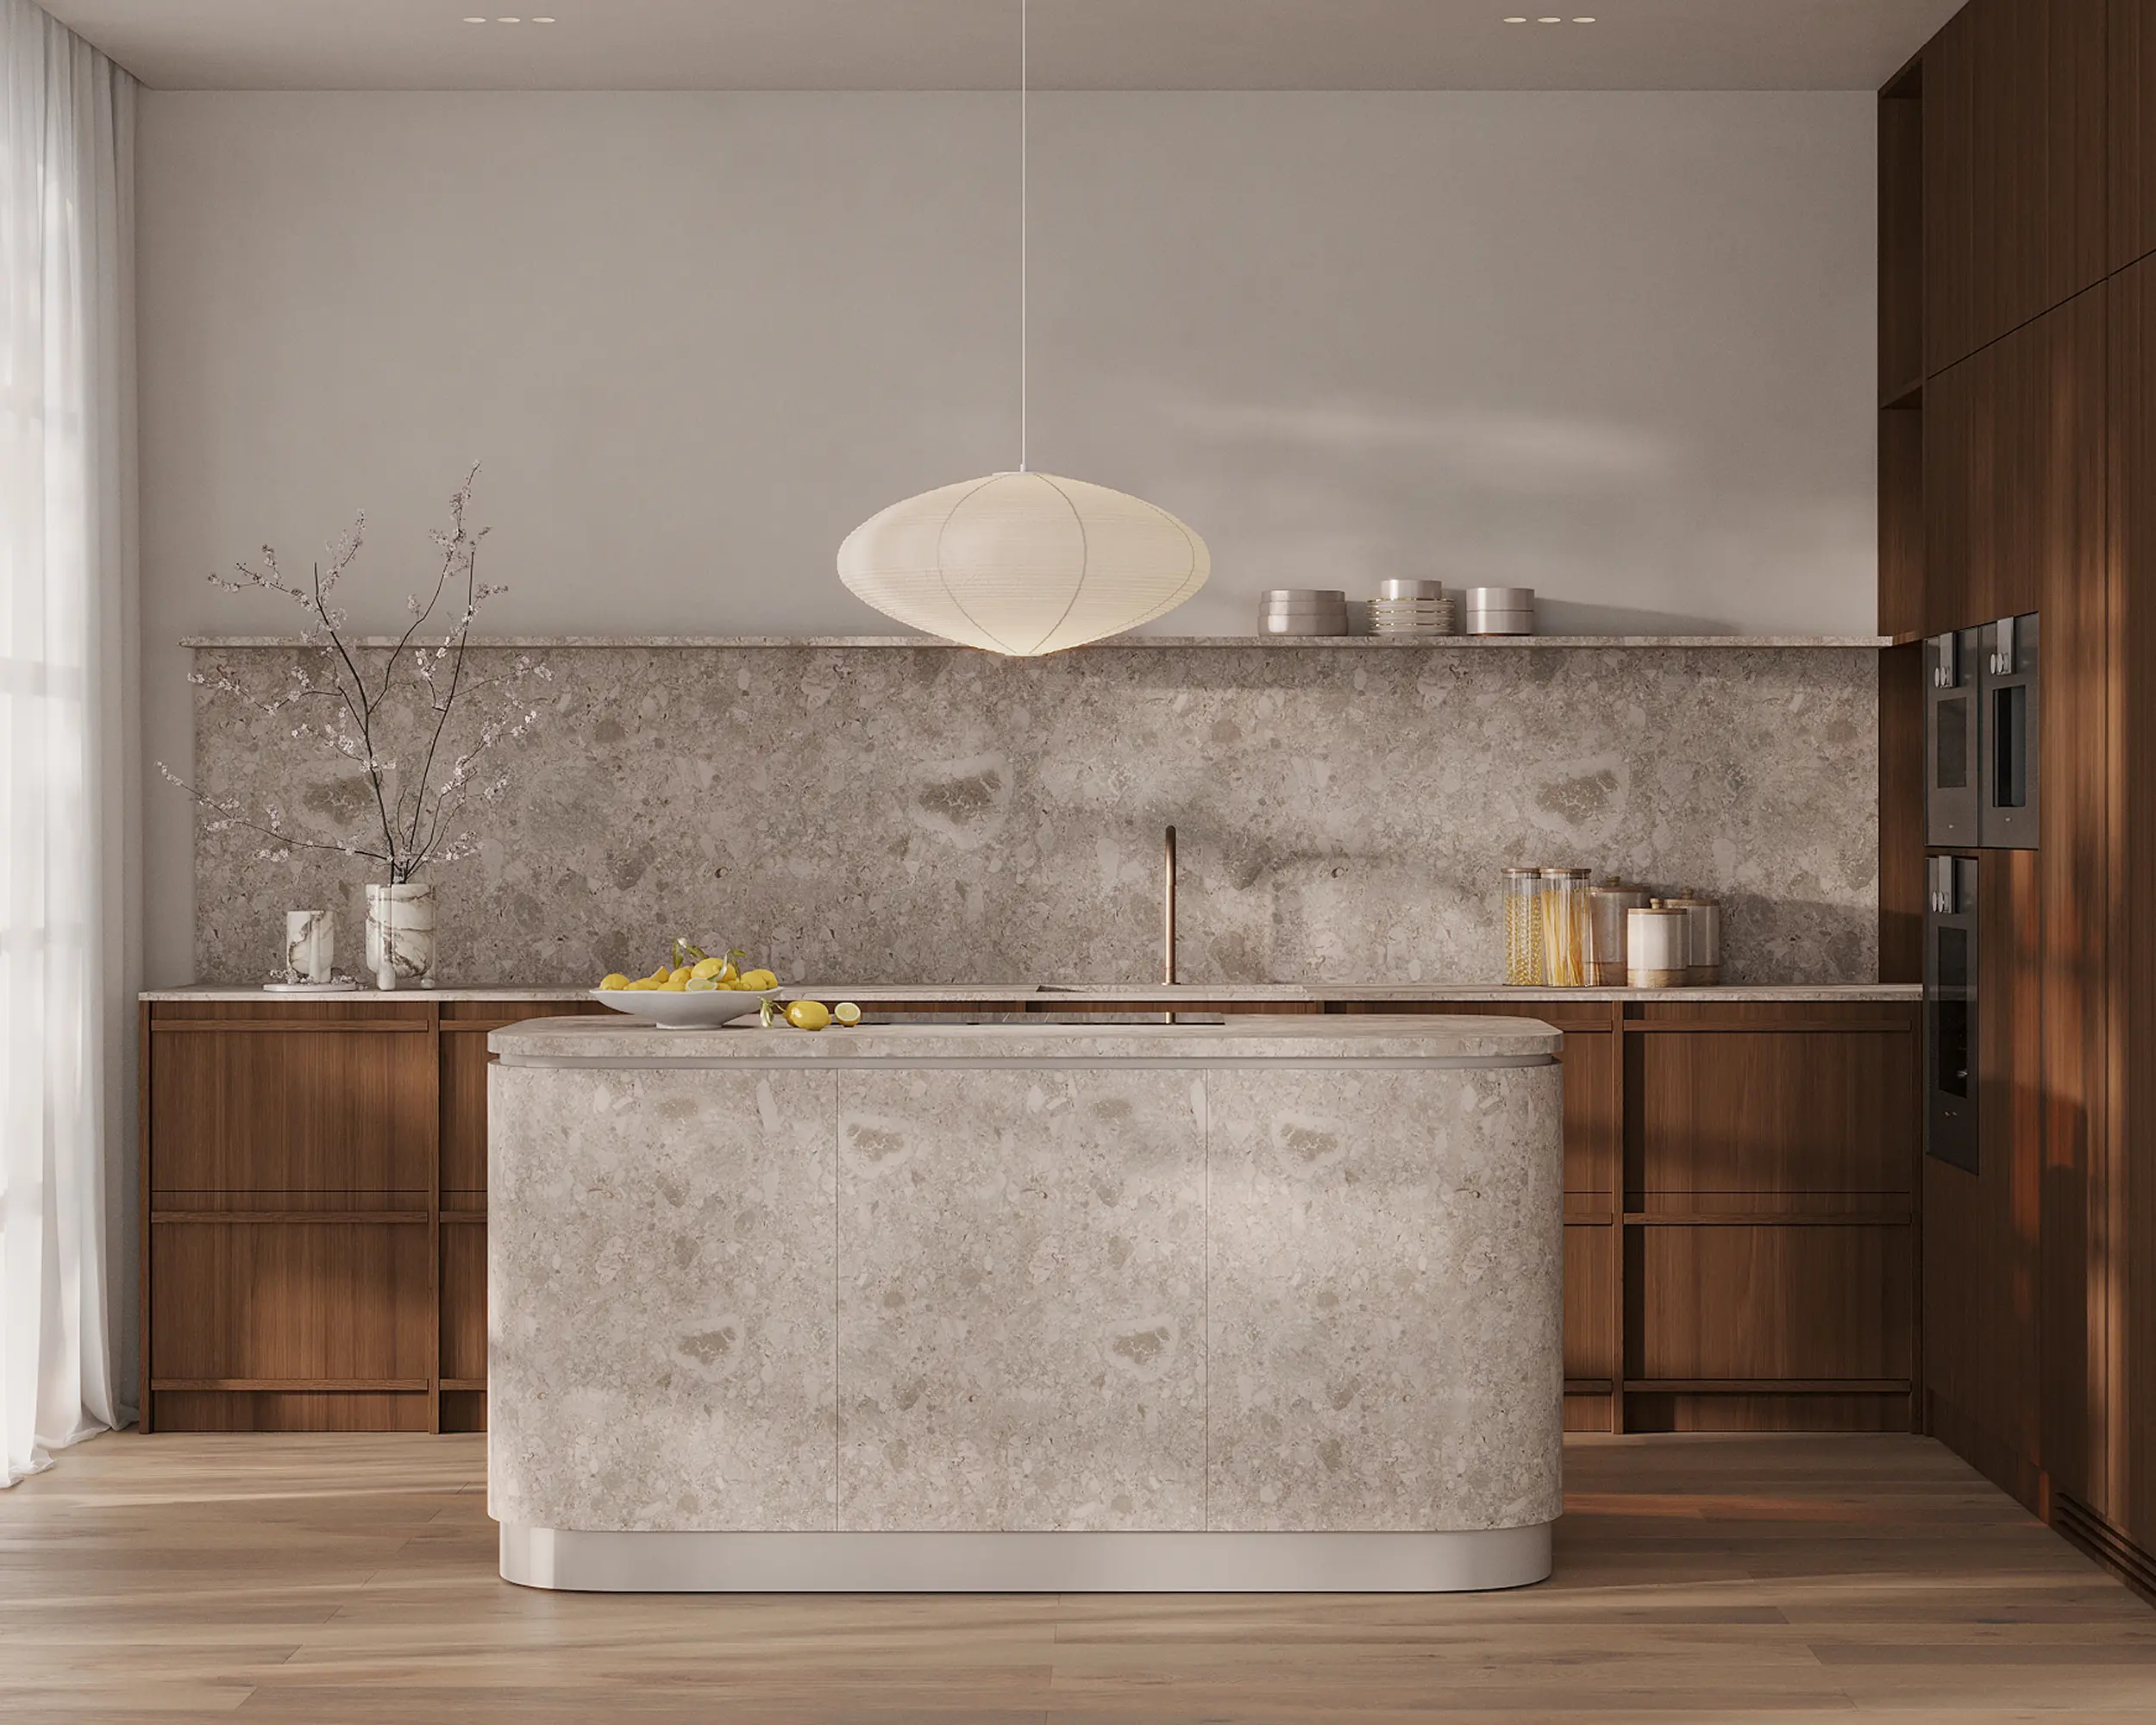
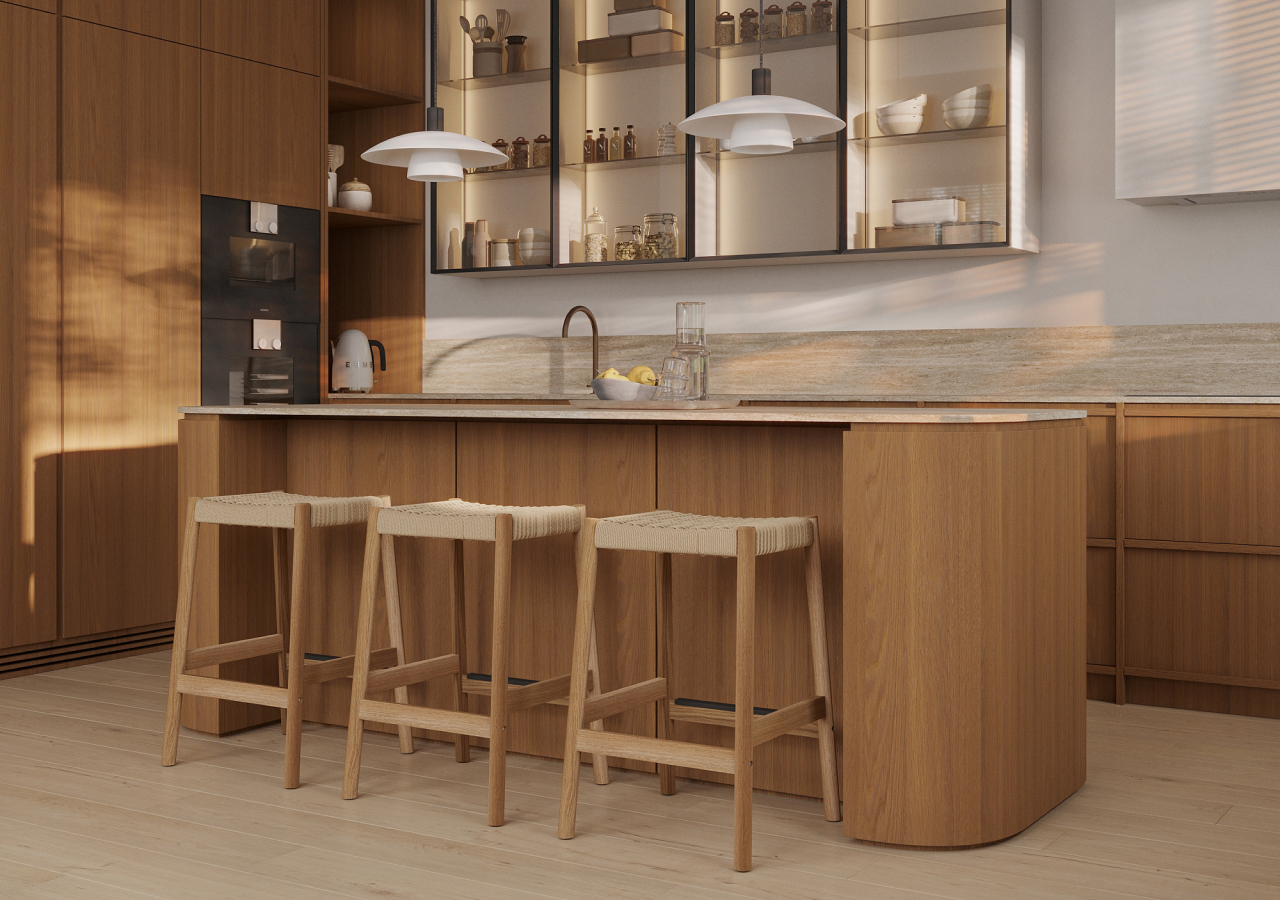
The curved kitchen island is no longer just a trend. It has become one of the most searched design features in modern kitchens — and for good reason. A rounded kitchen island softens circulation, improves seating flow, and introduces sculptural calm into open-plan homes.
Unlike straight islands, a modern curved kitchen island requires more planning. Proportion, seating depth, storage configuration, power placement, and integrated waste all need to be resolved early. When done right, a curved island looks minimal and effortless while working harder than a traditional rectangular block.
This guide breaks down 20 curved kitchen island ideas, with real-world implementation guidance, focused entirely on making a curved island beautiful, practical, and ultra-functional.
Curved Island Dimensions and Clearances
Curved Island & Bar Concepts
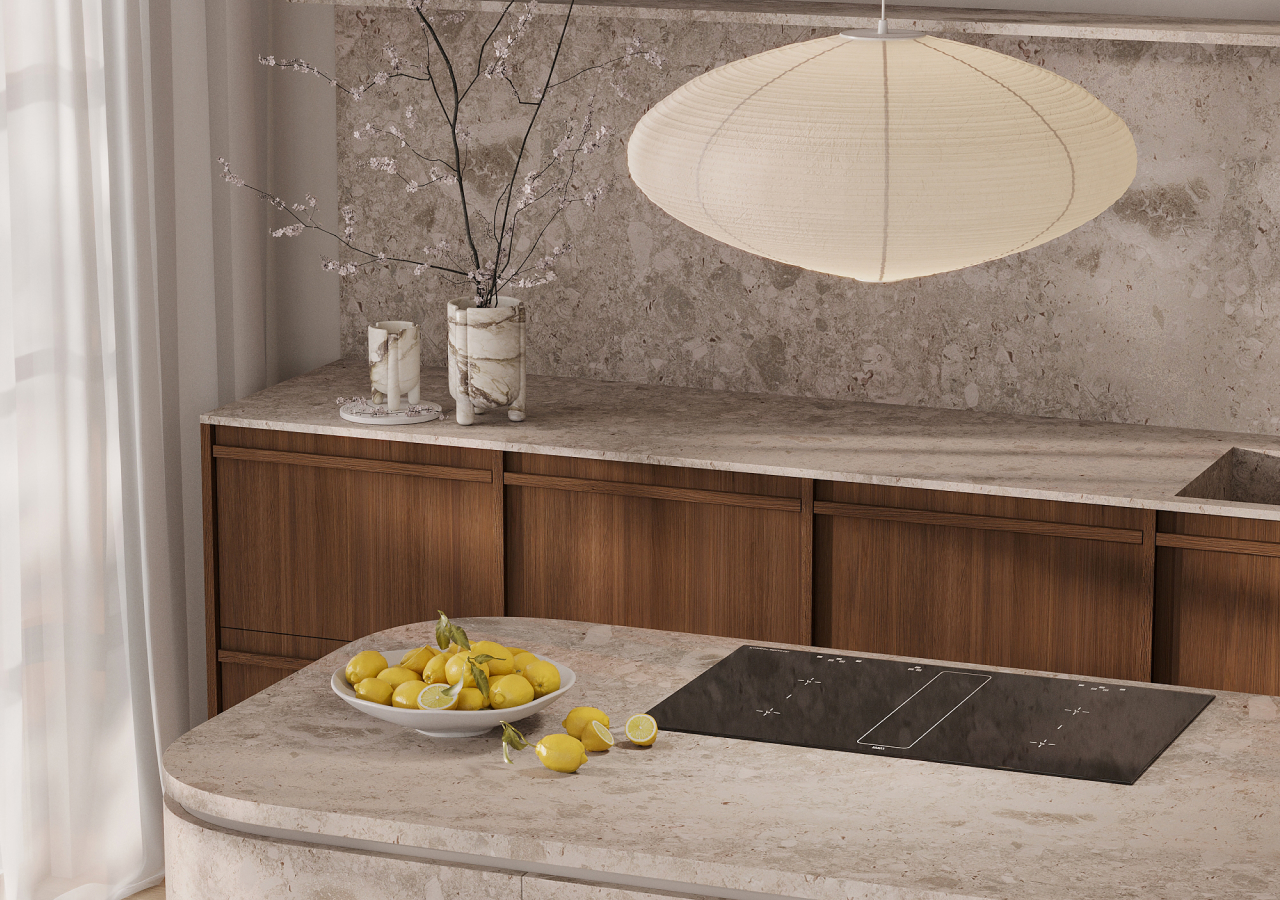
1. Fluted Curved Island for Texture
A curved fluted kitchen island adds texture that emphasizes the arc without needing bold color or busy hardware. Vertical fluting catches light, creates rhythm, and makes the island feel more furniture-like. Keep the countertop simple so the texture leads, and reserve fluting for outward-facing panels while the working side stays drawer-efficient. If you want the island to feel extra minimal, use one consistent flute spacing and avoid mixing other strong patterns nearby. Soft, warm lighting makes the fluting look richer and less harsh.
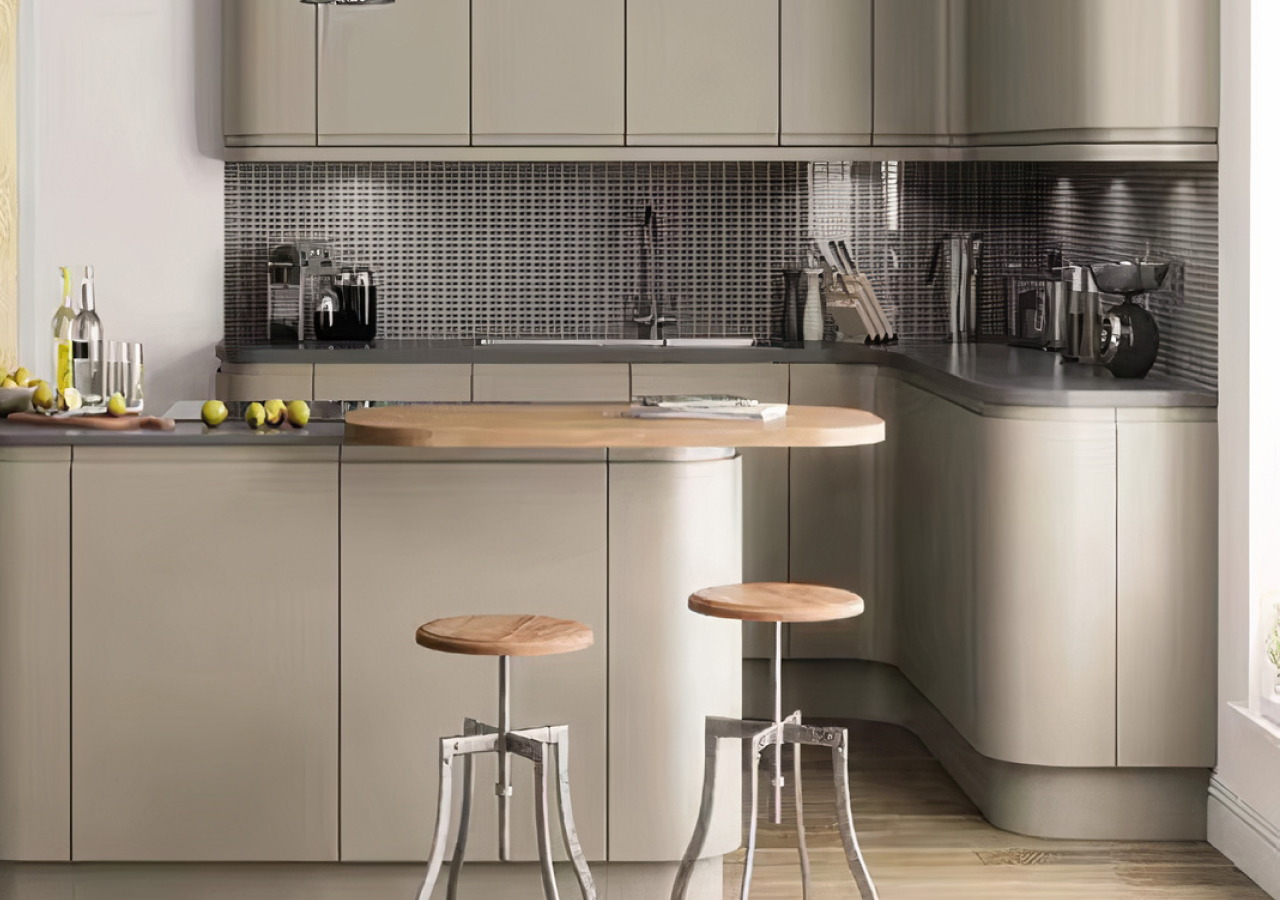
2. Half-Moon Island
.webp)
A half-moon island sits flat against one side and sweeps outward into the room, creating a curved island kitchen moment without consuming too much space. The straight side keeps cabinet interiors efficient for drawers, waste pull-outs, and prep tools, while the curved face softens traffic and reduces bump points. Use the flat side as the “work wall” and the curve as the social edge. Keep the radius gentle and the overhang modest so circulation stays comfortable, especially in tighter kitchens.
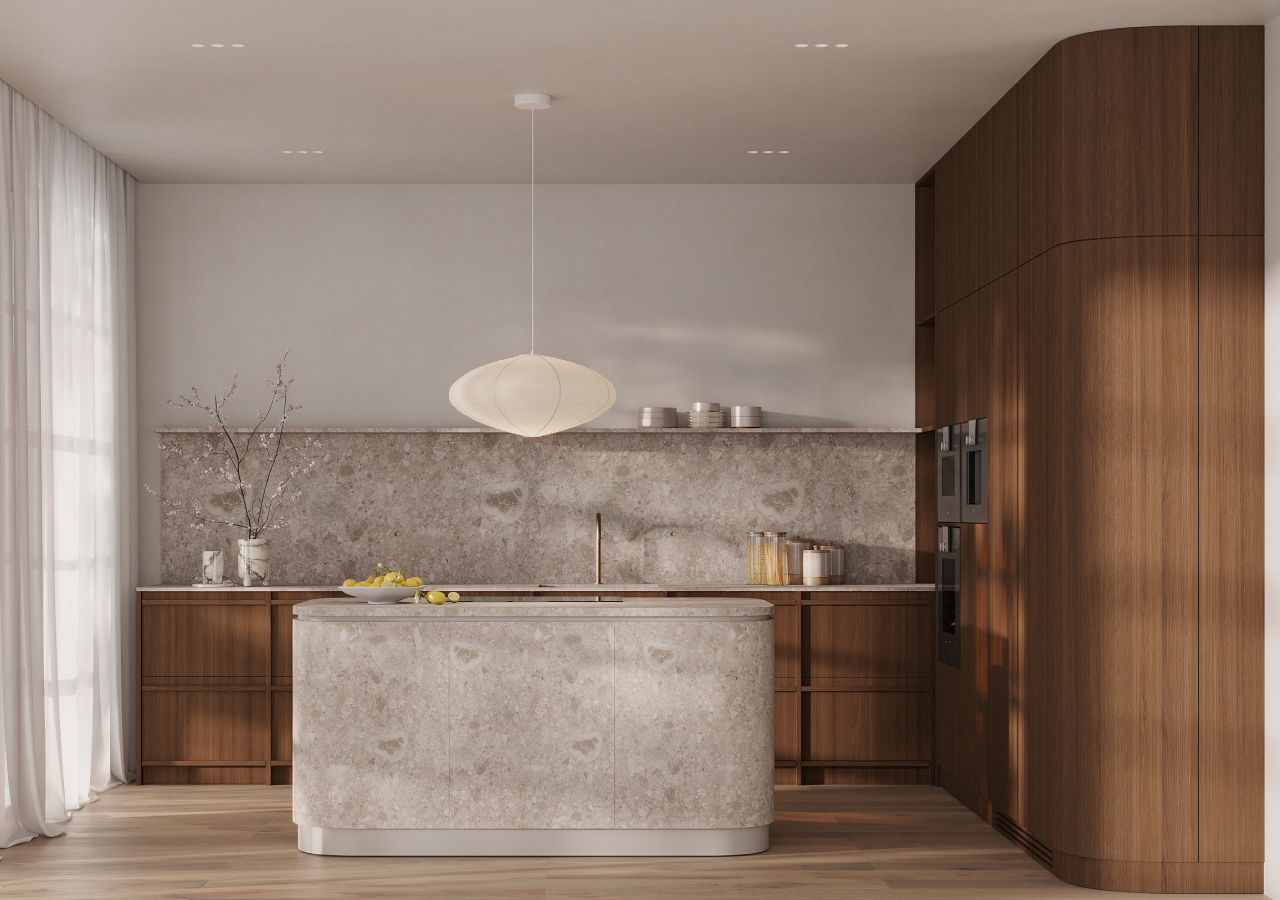
3. Circular Center Island
A circular center island is the boldest curved kitchen island design and works best in larger kitchens where you can maintain generous clearances. The shape encourages gathering from every direction and creates a strong focal point. Function comes from zoning: plan one arc for prep, one for serving, and one for seating, rather than forcing a single long storage run. Keep outlets discreet on a side panel or under an overhang. Minimal countertop styling helps the circle read sculptural, not bulky.
4. Curved Waterfall Countertop Island
.webp)
A curved waterfall countertop island makes the surface feel architectural: the stone (or compact surface) flows to the floor along a gentle radius. It’s visually seamless, protects cabinet corners, and amplifies the soft geometry. To keep it practical, pair the waterfall with calm, handleless fronts and tight reveals so the curve stays uninterrupted. If you’re adding seating, place the waterfall on a non-seating end to avoid knee conflicts. Plan seams where they’re least visible so the curve reads like one continuous piece.
5. Floating Curved Island with Underlighting
A floating curved island uses a recessed plinth plus underlighting to make the mass feel lighter, especially helpful in open concept rooms. The glow highlights the curve at night, improves wayfinding, and adds depth without adding clutter. Choose warm LEDs so the effect feels premium and inviting. Plan wiring early so the lighting looks integrated, not tacked on. Keep the toe-kick crisp and the countertop profile simple. This approach works particularly well for a modern curved kitchen island in minimal, warm-toned spaces.
6. Two-Tone Curved Bar Extension
.webp)
A two-tone curved bar extension layers function: the main surface stays for prep, while a contrasting bar top defines the seating zone. It’s a clean solution for open layouts because it can hide prep mess from the living side while keeping the kitchen social. Keep supports hidden inside cabinetry rather than visible brackets that interrupt the curve. Tuck outlets under the bar lip for charging and laptops so cords don’t land on the worktop. Limit finishes to two so the island remains calm and cohesive.
7. Oval Kitchen Island with Integrated Seating
.webp)
An oval curved kitchen island with seating combines prep, dining, and gathering in one smooth footprint. The rounded perimeter improves circulation because traffic naturally wraps around the island, and stools can angle without blocking walkways. Keep the working side drawer-first for efficiency, then reserve the curved edge for a clean seating overhang. Aim for 36–42 inches of clearance around the island and about 24 inches per seat. Hide outlets under the overhang to keep the surface visually minimal.
8. Compact Curved Island for Small Kitchens
.webp)
A compact curved island for small kitchens can be a half-circle footprint or simply a rounded end that improves movement in tight layouts. Even a subtle curve reduces bump corners and makes walkways feel wider. Prioritize storage that earns its footprint: deep drawers, a narrow tray divider, and integrated waste near prep. Keep seating light with a modest overhang so you don’t steal clearance. A slimmer countertop edge profile helps the island read lighter, which matters when the room is small and every line is visible.
9. Bar-Height Curved Counter
.webp)
A bar-height curved counter wraps the island edge to create an elevated seating zone without adding a second piece. It’s especially useful in open concept kitchens because it screens the work surface from view while still feeling social. Keep the curve continuous and avoid chunky brackets that break the line. Place outlets under the raised lip so charging stays off the countertop. Inside the base, stay drawer-first so tools are accessible and the island remains functional. This is an easy way to make a rounded kitchen island feel intentional.
10. Curved Café Bar Zone
.webp)
A curved café bar zone is a built-in curved nook off the main island for coffee, drinks, or quick breakfasts. It keeps small appliances out of the primary prep zone, helping the kitchen stay visually calm. Build shallow storage for mugs and supplies, and hide outlets inside the cabinet so cords don’t live on the surface. Match the radius to the island curve so it feels integrated. Add soft under-shelf lighting to create a warm “destination” without cluttering the main countertop.
Cabinetry & Storage with Flow
11. Curved Lower Cabinets
Curved lower cabinets replace sharp edges with sweeping arcs that guide the eye and soften circulation paths. They’re most effective where a straight run would create a hard stop—near an island end, a passage, or a seating zone. To keep storage practical, use straight drawer boxes behind a curved face panel so capacity stays strong. Keep fronts handleless or use discreet recessed pulls to avoid interrupting the line. This is a cornerstone of curved kitchen cabinets done in a modern, minimal way.
12. Curved Wall Cabinets
Curved wall cabinets carry softness upward and add rhythm to tall elevations, especially when long walls feel flat or severe. Keep the radius gentle and the fronts clean so they read modern rather than ornate. Use them to visually connect a curved island to perimeter cabinetry in open layouts. Inside, stick to simple adjustable shelves so the storage remains flexible. If you’re mixing straight and curved elements, echo the island’s curve directionally (not necessarily perfectly) so the room feels cohesive instead of randomly rounded.
13. Curvy Cut-Out Cabinets with Display Shelves
.webp)
Curvy cut-out cabinets with display shelves carve breathing space into a larger volume and give a few objects a dedicated home. This reduces countertop clutter while adding depth and warmth, especially on the living-facing side of an island or tall unit. Keep the niche shallow so it doesn’t steal storage, and style lightly so it stays calm. If you add lighting, make it soft and concealed. The curve should feel like a gentle scoop, not a dramatic shape that turns into a dust-catching feature.
14. Arched Pantry or Cabinet Opening

An arched pantry or cabinet opening is an architectural curve that instantly softens the kitchen without changing the layout. It works well behind or near the island so curved elements relate across the space. Keep trim minimal and finishes consistent so the arch feels timeless, not themed. Inside the pantry, keep function straightforward: straight shelves, pull-outs, and clear zones for food and appliances. The goal is a curved moment that improves the feel of the room while preserving the storage discipline that makes a kitchen easy to live with.
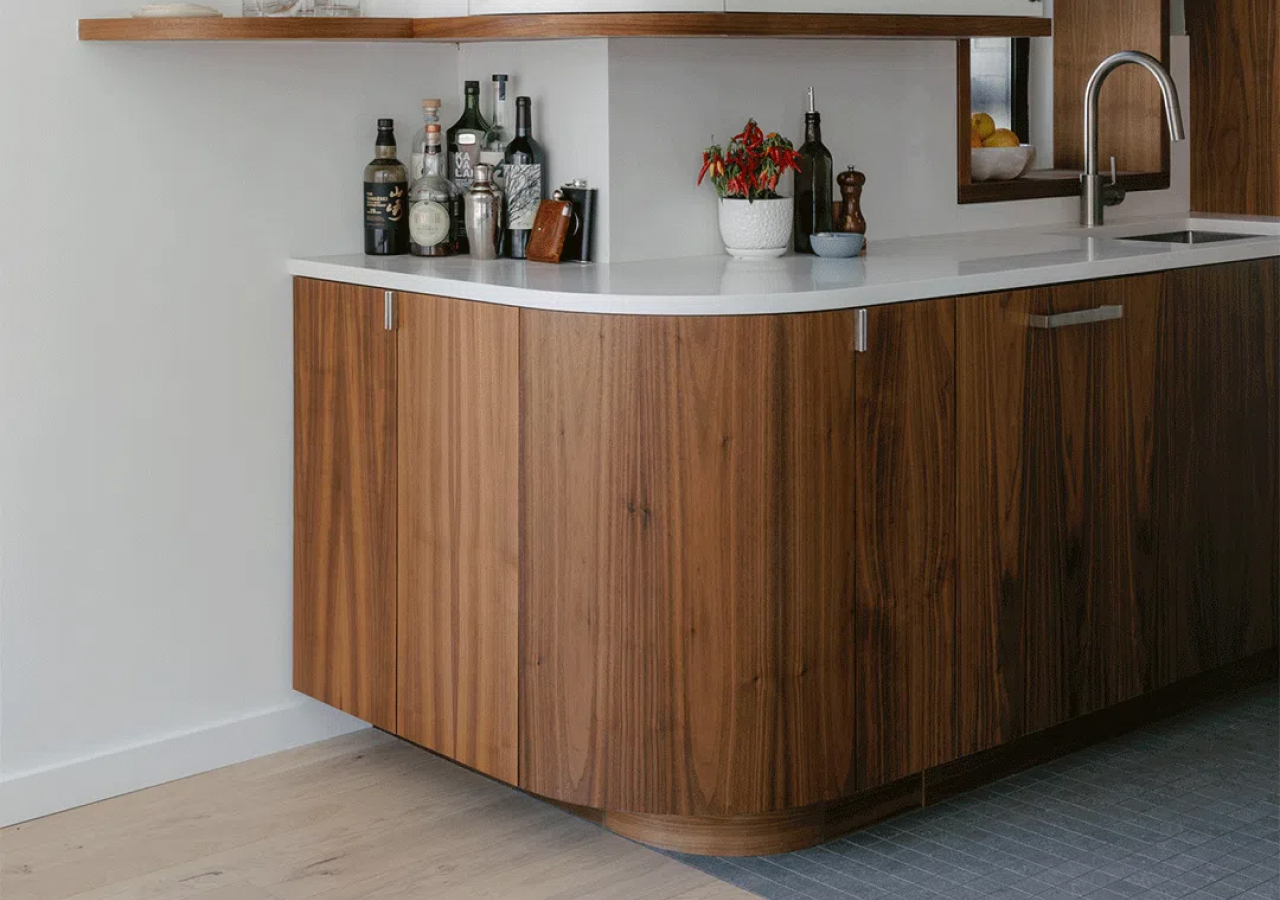
15. Rounded Corner Base Cabinets
Rounded corner base cabinets remove awkward bump points and make circulation smoother where paths tighten. They’re especially useful near doorways, main walk lanes, or the “end” of an island where corners get hit most. Treat the rounded corner as a protective buffer rather than a complex storage puzzle; keep internal organization simple and reliable. Match the cabinet radius to the countertop radius so the island reads as one continuous form. This is a practical way to get a rounded kitchen feel without overcomplicating construction.
Design & Detail Enhancements
16. Rounded Countertop Edges
Rounded countertop edges are the simplest curved kitchen move because they don’t require new cabinetry or a new floor plan. They soften touch, improve safety, and visually reduce the heaviness of thicker tops. Choose one edge profile and repeat it across the island and perimeter so the softness feels designed. A small radius reads modern and minimal; a fuller round reads warmer and more tactile. This also pairs well with a curved edge kitchen island or rounded corners, because the surface and base feel like one intentional object.
17. Curved Backsplash & Niches
.webp)
Curved backsplash returns and arched niches add depth to vertical surfaces and keep long runs from feeling flat. They reinforce a curved kitchen design without demanding curved cabinetry everywhere. Keep materials calm and continuous so the curve reads as form rather than decoration. Niches can also improve function by giving oils, salt, or a tray a dedicated home, which helps counters stay clear. Limit yourself to one strong curved niche or one curved backsplash moment—too many curves can start to feel busy.
18. Cylindrical or Curved Range Hood

A cylindrical or curved range hood repeats the curve above the cook zone, balancing the island’s softness and making the room feel cohesive. Keep lines clean and finishes matte so the hood complements the kitchen rather than becoming a competing statement. If your island is bold (oval, circular, fluted), keep the hood calmer and proportional. If the island is subtle (rounded corners), the hood can carry more shape. Tie the hood to the rest of the room with matching hardware tones and a restrained palette.
19. Curved Open Shelving
.webp)
Curved open shelving keeps kitchens airy while softening transitions: around corners, at the end of a run, or near a curved island. It’s most successful when it’s purposeful: everyday glassware, a few ceramics, or a single styled zone, not a full wall of objects. Keep depth around 8–12 inches for usability and visual lightness. Add discreet under-shelf lighting if you want warmth without clutter. A gentle curve is usually better than a dramatic swoop; it should feel like flow, not a gimmick.
20. Rounded Lighting & Fixtures
Rounded lighting fixtures echo the curves below and make the whole room feel intentional. Globe pendants, soft domes, and gently rounded sconces complement curved kitchen cabinets and a curved kitchen island without adding complexity. Align pendants with the island centerline and keep spacing even so the composition feels balanced. Choose warm light output to flatter wood tones and matte surfaces. If you already have strong texture (fluting, stone movement), keep fixtures simple, so they support the kitchen rather than competing for attention.
Straight vs Curved Kitchen Island: Choosing What’s Right
A straight island maximizes drawer efficiency and simplifies fabrication. A curved kitchen island improves flow, softens open layouts, and creates a sculptural focal point. If you’re unsure, begin with subtle rounded corners or a curved end detail before committing to a full oval or circular island.
The best choice depends on circulation patterns, seating needs, and how minimal you want the space to feel. Curves should enhance daily function, not complicate it.
Conclusion
A curved kitchen island can look purely artistic, but the best versions are quietly practical. Curves improve circulation, make seating feel less cramped, and soften the visual “block” effect that islands often create in open concept layouts. The secret is planning: keep the working core drawer-efficient, integrate waste near prep, hide power outlets so cords don’t land on the countertop, and choose surfaces and edge profiles that reinforce one continuous form.
Explore Corner Renovation’s collections or book a consultation to translate these ideas into a layout that works daily.
.webp)